
Marble Swirl Cake from Scratch is one of those timeless bakes that feels both nostalgic and impressive at the same time. The contrast of rich chocolate and soft vanilla woven together in a single loaf or layer cake makes each slice look unique. I bake this cake when I want the comfort of a buttery vanilla crumb and the depth of chocolate without having to commit to just one flavor.
This recipe is completely from scratch, built on a tender vanilla base that transforms into two batters before being swirled together. The method is straightforward, but attention to detail makes all the difference in achieving a beautiful marble effect and a soft, even crumb. If you follow the steps carefully, you will end up with a cake that looks bakery-worthy and tastes even better.
Everything you need is listed clearly below so you can measure, mix, swirl, bake, and enjoy without hesitation.
Ingredients For Marble Swirl Cake From Scratch
I rely on simple pantry ingredients for this cake, but precise measurement ensures consistent results. Room temperature ingredients help the batter blend smoothly and rise properly in the oven.
For the cake batter:
- 2 3/4 cups (345 g) all-purpose flour
- 2 1/2 teaspoons baking powder
- 1/2 teaspoon salt
- 1 cup (225 g) unsalted butter, softened
- 1 3/4 cups (350 g) granulated sugar
- 4 large eggs, room temperature
- 1 tablespoon pure vanilla extract
- 1 cup (240 ml) whole milk, room temperature
For the chocolate portion:
- 1/4 cup (25 g) unsweetened natural cocoa powder
- 2 tablespoons milk
- 1 tablespoon granulated sugar
Optional simple glaze for finishing:
- 1 cup (120 g) powdered sugar
- 2 tablespoons milk
- 1/2 teaspoon vanilla extract
The cocoa mixture transforms part of the vanilla batter into chocolate without affecting the overall structure of the cake. Using natural cocoa powder keeps the flavor balanced and classic.
Equipment Needed
I typically bake this in a 9×5-inch loaf pan for a traditional marble loaf, but two 8-inch round pans also work if you prefer a layer cake. You will need a stand mixer or hand mixer, mixing bowls, a whisk, a rubber spatula, parchment paper, and a cooling rack.
Before mixing, I preheat the oven to 350°F (175°C). I grease the pan thoroughly with butter and line it with parchment paper, leaving some overhang if using a loaf pan. Proper preparation prevents sticking and makes removal easy.
Preparing The Dry Ingredients
I begin by sifting together the flour, baking powder, and salt into a bowl. Sifting helps distribute the baking powder evenly and removes any lumps in the flour. This step contributes to a fine, even crumb.
After sifting, I whisk the mixture briefly to ensure everything is fully combined. I set it aside while I prepare the butter and sugar.
Creaming Butter And Sugar
The creaming stage sets the foundation for a soft Marble Swirl Cake from Scratch. I place the softened butter in the mixing bowl and beat it on medium speed for about one minute until smooth and creamy. The butter should be soft enough to press easily but not melted.
I gradually add the sugar while continuing to beat. Over the next four to five minutes, the mixture becomes pale and fluffy. This step incorporates air, which expands during baking and helps the cake rise properly.
I scrape down the sides and bottom of the bowl halfway through. Even mixing prevents dense streaks in the final cake.
Adding Eggs And Vanilla
I add the eggs one at a time, beating well after each addition. This gradual process keeps the batter smooth and prevents separation. If the mixture looks slightly curdled at any point, I add a tablespoon of the measured flour and mix briefly.
Once all the eggs are incorporated, I mix in the vanilla extract. The batter should look glossy and slightly thick at this stage, with a rich buttery aroma.
Incorporating Dry Ingredients And Milk
With the mixer on low speed, I add the flour mixture in three additions, alternating with the milk in two additions. I begin and end with the dry ingredients. This method keeps the batter smooth and prevents overmixing.
I mix just until the flour disappears into the batter. Overmixing can develop too much gluten, resulting in a tough texture instead of a tender crumb. After mixing, I fold the batter gently with a spatula to ensure no flour pockets remain.
The finished vanilla batter should be thick, smooth, and spreadable.
Preparing The Chocolate Batter
To create the chocolate swirl, I scoop about one-third of the vanilla batter into a separate bowl. In a small bowl, I mix the cocoa powder, sugar, and two tablespoons of milk until smooth. The mixture should form a thick paste without lumps.
I add this cocoa paste to the separated batter and fold gently until fully combined. The chocolate batter should be smooth and slightly darker than the vanilla base. The texture should remain thick and similar to the original batter.
Layering And Swirling The Batter
I begin by spooning half of the vanilla batter into the prepared pan, spreading it evenly. Then I add half of the chocolate batter in dollops over the vanilla layer. I repeat with the remaining vanilla batter and finish with the remaining chocolate batter on top.
Using a butter knife or skewer, I gently swirl the batters together. I move the knife through the batter in a figure-eight motion, being careful not to overmix. Over-swirling can blend the colors too much and reduce the marbled effect.
The goal is to create distinct ribbons of chocolate and vanilla throughout the cake.
Baking The Cake
I place the pan in the center of the preheated oven. The loaf version bakes for about 55 to 65 minutes, while round layers bake for 30 to 35 minutes. I begin checking near the lower end of the baking time by inserting a toothpick into the center.
If it comes out clean or with a few moist crumbs, the cake is ready. The top should be golden with visible swirls of darker chocolate peeking through. I avoid opening the oven too early to prevent sinking.
Once baked, I let the cake cool in the pan for 15 minutes before transferring it to a cooling rack.
Cooling Completely
I carefully lift the cake from the pan using the parchment overhang if using a loaf pan. Then I place it on a wire rack to cool completely. Cooling fully before glazing or slicing helps maintain clean edges and proper texture.
The aroma at this stage is rich with both vanilla and chocolate, blending together beautifully.
Optional Vanilla Glaze
For a simple finish, I mix powdered sugar, milk, and vanilla extract in a bowl until smooth. The glaze should be pourable but not watery. If it is too thick, I add a few drops of milk at a time.
Once the cake is completely cool, I drizzle the glaze over the top. It will cascade gently down the sides and set within about 20 minutes. The glaze adds sweetness and a polished look without overpowering the cake.
Texture And Flavor Profile
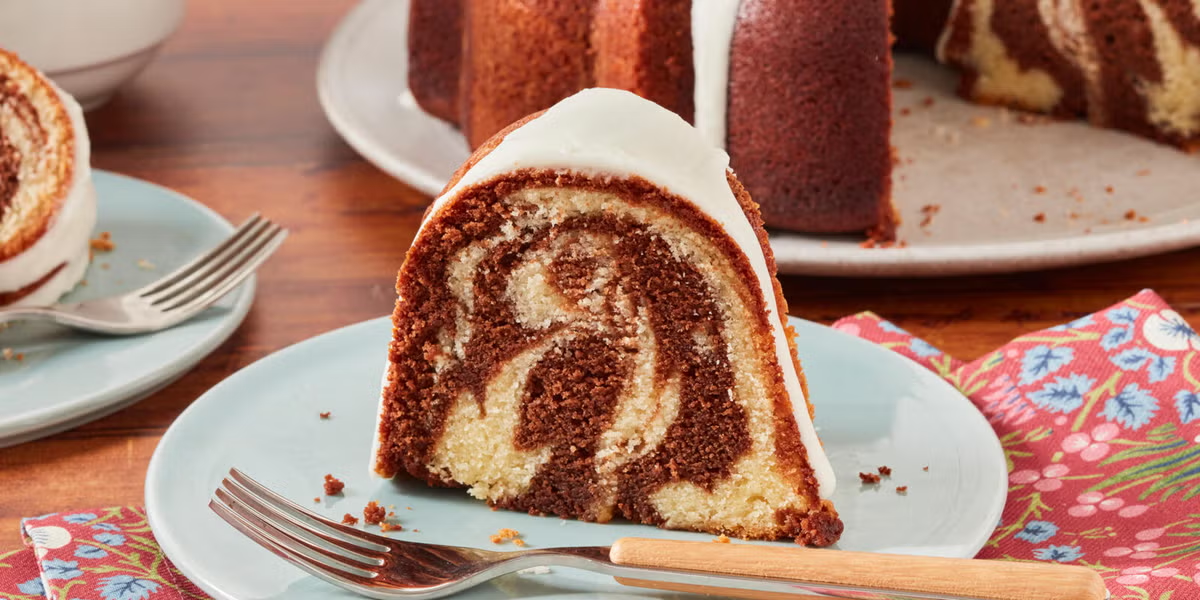
Marble Swirl Cake from Scratch delivers the best of both flavors in each bite. The vanilla portion is buttery and soft, while the chocolate ribbons provide depth and richness. The crumb remains tender yet sturdy enough for clean slicing.
The balance between flavors prevents the cake from feeling too heavy. Each slice reveals a unique swirl pattern, making it visually appealing as well as delicious.
Storage And Shelf Life
I store the cake covered at room temperature for up to three days. The flavor deepens slightly on the second day, and the texture stays moist. If glazed, I allow the glaze to set before covering loosely.
For longer storage, I wrap the unglazed cake tightly in plastic wrap and freeze it for up to two months. I thaw it overnight in the refrigerator and bring it to room temperature before serving.
Troubleshooting Tips
If the cake turns out dense, the butter and sugar may not have been creamed long enough. Proper aeration during that stage is essential. Measuring flour accurately also prevents heaviness.
If the swirl pattern disappears, the batter may have been overmixed during swirling. Gentle figure-eight motions create the best visual effect.
If the cake cracks excessively on top, the oven temperature may be slightly high. Using an oven thermometer helps ensure accuracy.
Serving Suggestions
I slice this cake thick and serve it with coffee or tea for an afternoon treat. It also pairs beautifully with a scoop of vanilla ice cream or a dollop of whipped cream.
For gatherings, I cut it into neat slices and arrange them on a platter so the marbled interior is visible. The visual contrast between chocolate and vanilla makes it an instant centerpiece.
Final Thoughts
Marble Swirl Cake from Scratch remains one of my favorite classic bakes because it combines two beloved flavors in one beautiful cake. The method is simple, the ingredients are familiar, and the result is consistently satisfying. With careful mixing and gentle swirling, you can create a cake that looks impressive yet feels comforting and homemade.
Once you slice into it and see the chocolate and vanilla woven together, you will appreciate how straightforward techniques can produce something truly special. This cake earns its place in any recipe collection and delivers dependable flavor in every bite.