
Soft vanilla sponge cake is the kind of recipe I rely on when I need a dependable base for birthdays, casual weekend desserts, or elegant layered celebration cakes. The crumb is light yet sturdy, the flavor is delicately sweet with real vanilla warmth, and the texture stays moist for days when stored properly. I bake this cake whenever I want something versatile enough to pair with whipped cream and berries, silky buttercream, chocolate ganache, or even a simple dusting of powdered sugar.
This is a true, from-scratch soft vanilla sponge cake made with simple pantry ingredients and a clear step-by-step method. If you follow the measurements and instructions carefully, you will have a beautifully risen sponge with a fine, tender crumb and a golden top that springs back gently when pressed. I will walk you through each stage so you can bake it confidently without second-guessing anything.
Ingredients For Soft Vanilla Sponge Cake
I always measure accurately for sponge cakes because precision is what gives that fluffy yet stable structure. Room temperature ingredients are especially important here since they emulsify better and trap air more effectively.
For two 8-inch (20 cm) round cake pans, you will need:
- 2 1/2 cups (315 g) all-purpose flour
- 2 1/2 teaspoons baking powder
- 1/2 teaspoon salt
- 1 cup (225 g) unsalted butter, softened at room temperature
- 1 3/4 cups (350 g) granulated sugar
- 4 large eggs, room temperature
- 1 tablespoon pure vanilla extract
- 1 cup (240 ml) whole milk, room temperature
If you want a slightly richer flavor, you can replace 2 tablespoons of the milk with heavy cream, but this is optional. I stick to whole milk most of the time because it keeps the texture balanced and not overly dense.
Equipment You Will Need
I keep the equipment simple and practical. You do not need any fancy tools, but having the right basics makes a noticeable difference in consistency.
You will need two 8-inch round cake pans, parchment paper, a stand mixer or hand mixer, mixing bowls, a rubber spatula, a whisk, and a cooling rack. I also recommend a kitchen scale if you have one, since weighing flour prevents overpacking and keeps the sponge light.
Before I even start mixing, I preheat the oven to 350°F (175°C). I grease the cake pans with butter, line the bottoms with parchment paper, and lightly dust the sides with flour. This prevents sticking and ensures clean release after baking.
Preparing The Dry Ingredients
I begin by sifting the flour, baking powder, and salt together into a medium bowl. Sifting aerates the flour and evenly distributes the leavening agent, which helps the cake rise uniformly. Even if I am in a hurry, I do not skip this step because clumps of baking powder can create uneven pockets in the sponge.
After sifting, I whisk the dry mixture for about 20 seconds to make sure everything is fully combined. Then I set the bowl aside while I move on to the butter and sugar.
Creaming Butter And Sugar
The creaming stage is where the foundation of a soft vanilla sponge cake is built. I place the softened butter in the mixing bowl and beat it on medium speed for about one minute until smooth and creamy. The butter should not be melted or greasy, just soft enough to press with a finger.
I gradually add the sugar while continuing to beat. Over the next three to five minutes, the mixture transforms into a pale, fluffy mass. This step incorporates air, and that air expands in the oven to create lift. If the butter and sugar are not creamed properly, the cake will turn out dense rather than airy.
I scrape down the sides of the bowl halfway through to make sure everything is evenly mixed. Once the mixture looks lighter in color and texture, I know it is ready for the eggs.
Adding The Eggs And Vanilla
I add the eggs one at a time, beating well after each addition. This gradual method keeps the batter smooth and prevents curdling. If I rush and add all the eggs at once, the mixture can separate, which affects the final texture.
After the last egg is incorporated, I mix in the vanilla extract. I prefer pure vanilla extract because it gives a clean, warm aroma that defines this soft vanilla sponge cake. The batter at this stage should look creamy and slightly thick.
If the mixture ever looks slightly curdled, I add a tablespoon of the measured flour and beat briefly. That usually brings it back together without any issues.
Combining Dry Ingredients And Milk
Now I reduce the mixer speed to low and begin adding the dry ingredients in three parts, alternating with the milk in two parts. I start with dry ingredients, then milk, dry again, milk, and finish with dry. This alternating method keeps the batter smooth and prevents overmixing.
I mix just until the flour disappears into the batter. Overmixing at this stage can develop too much gluten, which makes the cake tough instead of soft. Once combined, I use a spatula to gently fold the batter and make sure no flour pockets remain at the bottom of the bowl.
The final batter should be smooth, thick but pourable, and lightly glossy. It should not be runny or overly stiff.
Filling The Cake Pans
I divide the batter evenly between the two prepared pans. Using a kitchen scale ensures perfect layers, but you can eyeball it if needed. I gently tap each pan on the counter to release any large air bubbles trapped inside.
To level the tops, I smooth the batter with a spatula. This helps the cakes bake evenly and reduces doming.
I place the pans in the preheated oven on the middle rack, making sure there is space between them for proper air circulation.
Baking The Sponge Cake
The cakes bake for about 25 to 30 minutes. I start checking at the 25-minute mark by inserting a toothpick into the center. If it comes out clean or with a few moist crumbs, the cake is done.
The tops should be lightly golden and spring back when gently pressed. The edges will slightly pull away from the sides of the pan. I avoid opening the oven too early because sudden temperature drops can cause the sponge to sink.
Once baked, I remove the pans from the oven and let them cool for 10 minutes. Then I run a knife around the edges and carefully turn the cakes out onto a wire rack to cool completely. Peeling off the parchment paper while the cake is still slightly warm makes it easier.
Achieving A Perfect Texture
A soft vanilla sponge cake depends on proper aeration and balanced moisture. Room temperature ingredients help the batter emulsify, which traps air evenly throughout. Accurate measuring prevents dryness or heaviness.
I also avoid overbaking because even five extra minutes can dry out a sponge. The cake continues to cook slightly from residual heat after being removed from the oven. Watching the visual cues is just as important as timing.
If the top domes slightly, I wait until the cake is fully cool and trim it gently with a serrated knife. This creates flat, professional-looking layers for stacking.
Simple Vanilla Whipped Cream Filling
For a light and classic finish, I often fill this cake with vanilla whipped cream and fresh fruit. It complements the delicate crumb without overpowering it.
You will need:
- 2 cups (480 ml) cold heavy cream
- 1/3 cup (40 g) powdered sugar
- 1 teaspoon vanilla extract
I whip the cream on medium speed until soft peaks form, then add the powdered sugar and vanilla. I continue whipping until medium-stiff peaks form. The cream should hold its shape but still look smooth and silky.
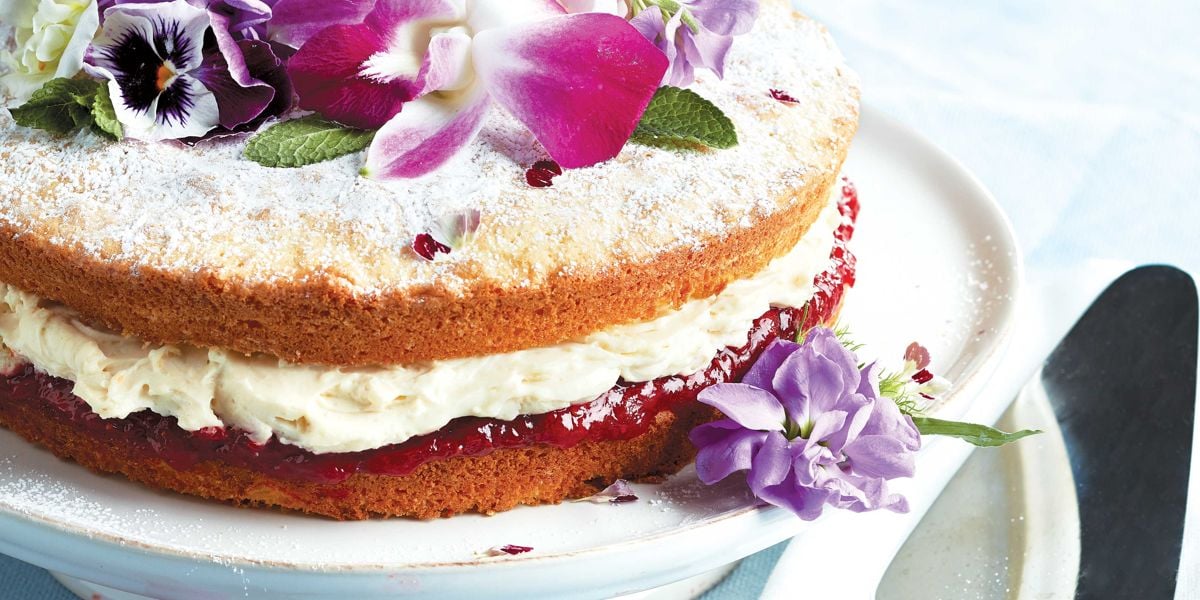
I spread an even layer over one cake round, add sliced strawberries or raspberries if I like, and place the second layer on top. A dusting of powdered sugar or a thin layer of whipped cream over the entire cake makes it elegant and simple.
Classic Vanilla Buttercream Option
If I am making this for birthdays or special occasions, I frost it with vanilla buttercream. The structure of the sponge supports frosting beautifully without collapsing.
For buttercream, you will need:
- 1 cup (225 g) unsalted butter, softened
- 3 1/2 cups (420 g) powdered sugar
- 2 tablespoons heavy cream or milk
- 2 teaspoons vanilla extract
- A pinch of salt
I beat the butter until creamy, gradually add powdered sugar, then mix in cream, vanilla, and salt. I beat for three to five minutes until fluffy. If the frosting is too thick, I add a teaspoon of milk at a time. If too soft, I add a bit more powdered sugar.
I apply a thin crumb coat first, chill the cake for 20 minutes, then finish with a smooth outer layer.
Flavor Variations
This soft vanilla sponge cake is incredibly adaptable. Sometimes I fold in lemon zest for a citrus version that pairs beautifully with berries. Other times I replace a quarter cup of flour with unsweetened cocoa powder to create a light marble effect when swirled gently.
A splash of almond extract alongside vanilla adds subtle depth. For festive occasions, I stir colorful sprinkles into the batter to make a fun confetti-style cake.
The base remains reliable no matter how I personalize it. That versatility is why I return to this recipe again and again.
Storage And Make-Ahead Tips
Once completely cool, I wrap each cake layer tightly in plastic wrap. At room temperature, the sponge stays fresh for up to two days. In the refrigerator, it keeps well for four to five days, though I let it come back to room temperature before serving for the best texture.
This cake also freezes beautifully. I wrap the layers in plastic wrap and then foil before freezing for up to two months. When ready to use, I thaw them overnight in the refrigerator while still wrapped to prevent condensation from soaking into the sponge.
If I need to bake ahead for an event, I often freeze the layers and frost them while still slightly chilled. This makes stacking and decorating easier.
Troubleshooting Common Issues
If the cake turns out dense, the butter and sugar may not have been creamed long enough. Insufficient aeration limits rise. Measuring flour incorrectly can also create heaviness, so I always spoon and level or weigh it.
If the cake sinks in the center, it may have been underbaked or the oven door was opened too early. I also check that the baking powder is fresh because expired leavening loses strength.
Dry texture usually comes from overbaking. Keeping an eye on the cake during the last five minutes helps prevent this problem.
Serving Ideas For Any Occasion
I serve this soft vanilla sponge cake in many ways depending on the occasion. For casual afternoons, I slice it thick and pair it with tea or coffee. For celebrations, I decorate it with piped buttercream swirls, fresh flowers, or chocolate shavings.
It works beautifully as a layered birthday cake, a baby shower centerpiece, or even a simple wedding dessert when stacked higher. The neutral vanilla flavor makes it suitable for almost any filling, from fruit compotes to rich ganache.
Because the crumb is soft yet sturdy, it slices cleanly without crumbling. That makes it ideal for neat presentation at parties and gatherings.
Final Thoughts
Soft vanilla sponge cake is one of those foundational recipes that every baker should have in their collection. It delivers a light, tender crumb, balanced sweetness, and dependable structure every single time I make it. With simple ingredients and careful technique, it transforms into a cake worthy of birthdays, holidays, and everyday indulgence.
I rely on this recipe whenever I want something classic, adaptable, and consistently delicious. Once you bake it and see how beautifully it rises and how soft each slice feels, it will likely become your go-to sponge as well.