
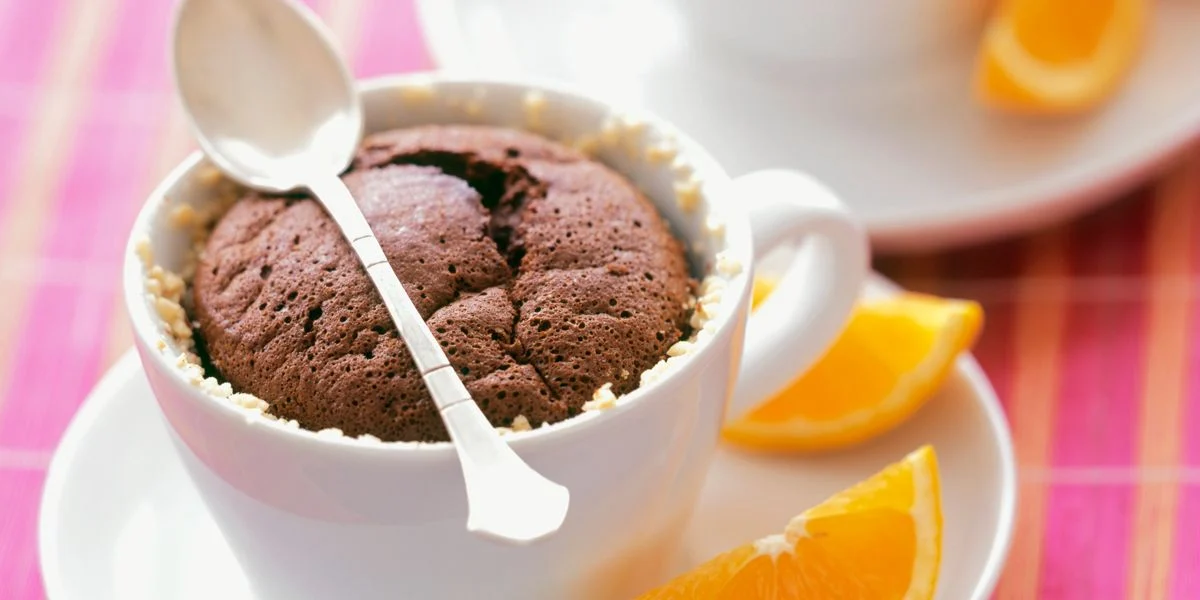
Chocolate cravings rarely wait for the perfect baking moment. Sometimes I want a rich, warm slice of cake without turning on the oven, washing multiple bowls, or waiting an hour for layers to cool. That is exactly why this 5-Minute Mug Chocolate Cake has become one of my favorite quick desserts. It delivers deep chocolate flavor, a soft crumb, and a gooey center in the time it takes to brew a cup of tea.
This recipe is designed for real life. I make it in a standard microwave-safe mug with simple pantry ingredients, and it never fails me. If you follow the measurements and steps exactly as written, you will have a perfectly cooked single-serving chocolate cake that tastes like it came straight from a bakery.
Ingredients You Will Need
I always gather everything before I begin because this recipe moves quickly. The measurements are precise, and small changes can affect texture. Here is exactly what you need for one generous serving.
4 tablespoons all-purpose flour
2 tablespoons unsweetened cocoa powder
3 tablespoons granulated sugar
1/8 teaspoon salt
1/4 teaspoon baking powder
3 tablespoons milk
2 tablespoons vegetable oil or melted butter
1/4 teaspoon pure vanilla extract
1 to 2 tablespoons chocolate chips (optional but highly recommended)
These ingredients create a soft, moist crumb with a rich chocolate base. The cocoa powder gives depth, while the oil keeps the cake tender. Chocolate chips melt into pockets of molten chocolate, which makes every bite better than the last.
The Right Mug Makes A Difference
I always use a microwave-safe mug that holds at least 12 ounces. The batter rises significantly while cooking, and a smaller mug can overflow and make a mess inside the microwave. A wider mug also helps the cake cook more evenly, preventing a rubbery center.
Ceramic mugs work best in my experience. Thin glass sometimes causes uneven heating, and narrow mugs create a dense center. If your mug has straight sides instead of tapering inward, the cake will rise more evenly and cook more consistently.
Step-By-Step Instructions
This cake comes together directly in the mug, which means no extra bowls and almost no cleanup. I measure carefully and mix thoroughly to avoid lumps.
First, I add the dry ingredients to the mug. That includes the flour, cocoa powder, sugar, salt, and baking powder. I use a fork or a small whisk to stir them together completely so that the cocoa powder is evenly distributed and no pockets of baking powder remain.
Next, I pour in the milk, oil, and vanilla extract. I stir slowly at first, scraping the bottom and corners of the mug to incorporate all the dry mixture. Once everything starts to combine, I mix more confidently until the batter becomes smooth and glossy. The texture should be thick but pourable, similar to traditional cake batter.
If I am adding chocolate chips, I fold them in at this stage. Sometimes I push a few extra chips into the center to create a molten core. That small detail transforms this simple cake into something that feels luxurious.
Once mixed, I gently tap the mug on the counter to remove any air bubbles. This helps the cake rise evenly and prevents large holes in the crumb.
Microwave Cooking Time
Microwaves vary in power, so timing may need slight adjustment. In a standard 900 to 1000 watt microwave, I cook the cake for 60 to 75 seconds. I usually start with 60 seconds and then check the center.
The top should look set but still slightly soft. If the surface appears wet or liquid in the center, I microwave in 10-second intervals until it looks just cooked. Overcooking will make the cake rubbery, so I stop as soon as the center is no longer shiny.
The cake continues to cook slightly from residual heat after removal. I let it rest for one to two minutes before digging in. That short waiting period allows the crumb to settle and prevents burnt tongues from overly hot chocolate.
Texture And Flavor Profile
The texture of this 5-Minute Mug Chocolate Cake is soft and moist with a tender crumb. It is not airy like a layered sponge cake, but it is far from dense or heavy. The oil keeps it from drying out, and the milk balances the cocoa’s intensity.
Flavor-wise, it delivers a strong chocolate punch. The sugar level is balanced so it is sweet without being overwhelming. When chocolate chips melt into the batter, they create rich pockets that almost resemble a chocolate truffle center.
If you prefer a darker, more intense chocolate flavor, you can add a tiny pinch of instant espresso powder to the dry ingredients. I do this occasionally when I want a deeper, slightly more complex taste without making the cake taste like coffee.
Optional Add-Ins And Variations
I enjoy experimenting with this base recipe while keeping the structure intact. The key is not to overload the batter or change the wet-to-dry ratio drastically.
For a peanut butter swirl, I drop a teaspoon of peanut butter into the center before microwaving. As the cake cooks, the peanut butter melts slightly and creates a creamy core. This variation feels indulgent and pairs beautifully with the chocolate base.
For a salted caramel twist, I add a soft caramel candy in the middle of the batter. A tiny pinch of flaky salt on top after cooking enhances the sweetness and adds contrast. The caramel melts into a gooey surprise that makes each spoonful exciting.
If I want something lighter, I stir in a tablespoon of chopped nuts for texture. Walnuts or hazelnuts work particularly well because they complement chocolate naturally. The nuts add crunch and depth without overpowering the cake.
How To Avoid Common Mistakes
Precision matters more in small recipes than in large ones. A little extra flour can make the cake dry, and too much liquid can leave it undercooked in the center. I always level my tablespoons rather than scooping heaping amounts.
Mixing thoroughly is also important. Dry flour pockets create unpleasant bites, so I take time to scrape the bottom and sides of the mug. Even though this recipe is fast, I never rush the mixing step.
Overcooking is the most common issue. Microwaves cook from the outside in, so the edges can become tough if the cake stays inside too long. I stop cooking when the center looks just set because carryover heat finishes the job.
Serving Ideas
I often eat this cake straight from the mug with a spoon. It is cozy, simple, and satisfying. However, adding toppings can transform it into something that feels restaurant-worthy.
A scoop of vanilla ice cream melts beautifully over the warm cake. The contrast between hot and cold creates a luxurious dessert experience. Whipped cream, chocolate syrup, or even fresh berries also work wonderfully.
Sometimes I dust a little powdered sugar over the top for a classic finish. If I am feeling extra indulgent, I drizzle melted chocolate over the surface and let it set slightly before serving. Small touches like these elevate the presentation without adding much effort.
Making It Dairy-Free
This recipe adapts easily for dairy-free diets. I replace regular milk with almond milk, oat milk, or soy milk in equal amounts. The flavor changes slightly depending on the milk used, but the texture remains soft and moist.
If I use oil instead of butter, the cake is naturally dairy-free except for the chocolate chips. Choosing dairy-free chocolate chips completes the substitution. The structure stays consistent as long as the liquid measurement remains the same.
Making It Gluten-Free
For a gluten-free version, I substitute the all-purpose flour with a 1:1 gluten-free baking blend. I make sure the blend contains xanthan gum for structure. The cake texture becomes slightly more delicate, but it still rises well and tastes rich.
I mix carefully when using gluten-free flour to ensure there are no lumps. Cooking time may increase by 5 to 10 seconds, depending on the blend. Checking frequently prevents overcooking.
Scaling The Recipe
This recipe is designed for one serving, but I sometimes make two mugs at once. Each mug must be mixed separately to maintain proper ratios. Microwaving both simultaneously can affect cooking time, so I usually cook them one at a time for best results.
Doubling the ingredients in one large mug does not work well because the center struggles to cook evenly. Sticking to single portions ensures a consistent texture every time.
Why This Recipe Works So Well
The balance between dry and wet ingredients is carefully proportioned. The baking powder provides just enough lift without causing collapse. Oil keeps the crumb tender even under intense microwave heat.
Microwaves cook quickly by exciting water molecules, which means moisture retention is critical. The milk and oil combination ensures the cake remains soft rather than turning chewy. Each ingredient plays a specific role, and removing one changes the structure noticeably.
Storing And Reheating
This cake is best enjoyed fresh. If I need to save part of it, I cover the mug with plastic wrap and leave it at room temperature for up to one day. The texture firms slightly as it cools.
To reheat, I microwave it for about 10 to 15 seconds. Longer heating can dry it out, so I warm it gently. Adding a teaspoon of milk before reheating helps restore moisture if needed.
Turning It Into A Lava Cake
For a molten center effect, I place a square of chocolate or a tablespoon of chocolate spread directly in the center of the batter. I make sure it is fully covered before microwaving. When cooked, the outside sets while the inside remains fluid and glossy.
Timing is critical for this variation. I cook for slightly less time, around 55 to 60 seconds, depending on microwave strength. The result is a soft outer cake with a flowing chocolate core that feels far more elaborate than the effort involved.
Perfect For Late-Night Cravings
Late evenings often bring sudden dessert cravings. Instead of reaching for packaged sweets, I make this mug cake. It satisfies the craving quickly without leaving behind a sink full of dishes.
Because it is portion-controlled, I enjoy dessert without feeling excessive. The single-serving format makes it practical and balanced. Within minutes, I have a warm chocolate treat that feels freshly baked.
Final Thoughts
This 5-Minute Mug Chocolate Cake proves that great desserts do not require complicated techniques or long baking times. With simple pantry staples and a microwave, I create a soft, rich chocolate cake that tastes far more indulgent than the effort suggests. The step-by-step method ensures consistent results, and small variations allow endless customization.
Whenever I need a quick chocolate fix, this recipe delivers without fail. It is fast, reliable, and deeply satisfying. If you follow the measurements carefully and watch the cooking time, you will have a warm, gooey chocolate cake ready in minutes, all made in a single mug.