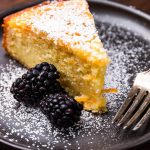
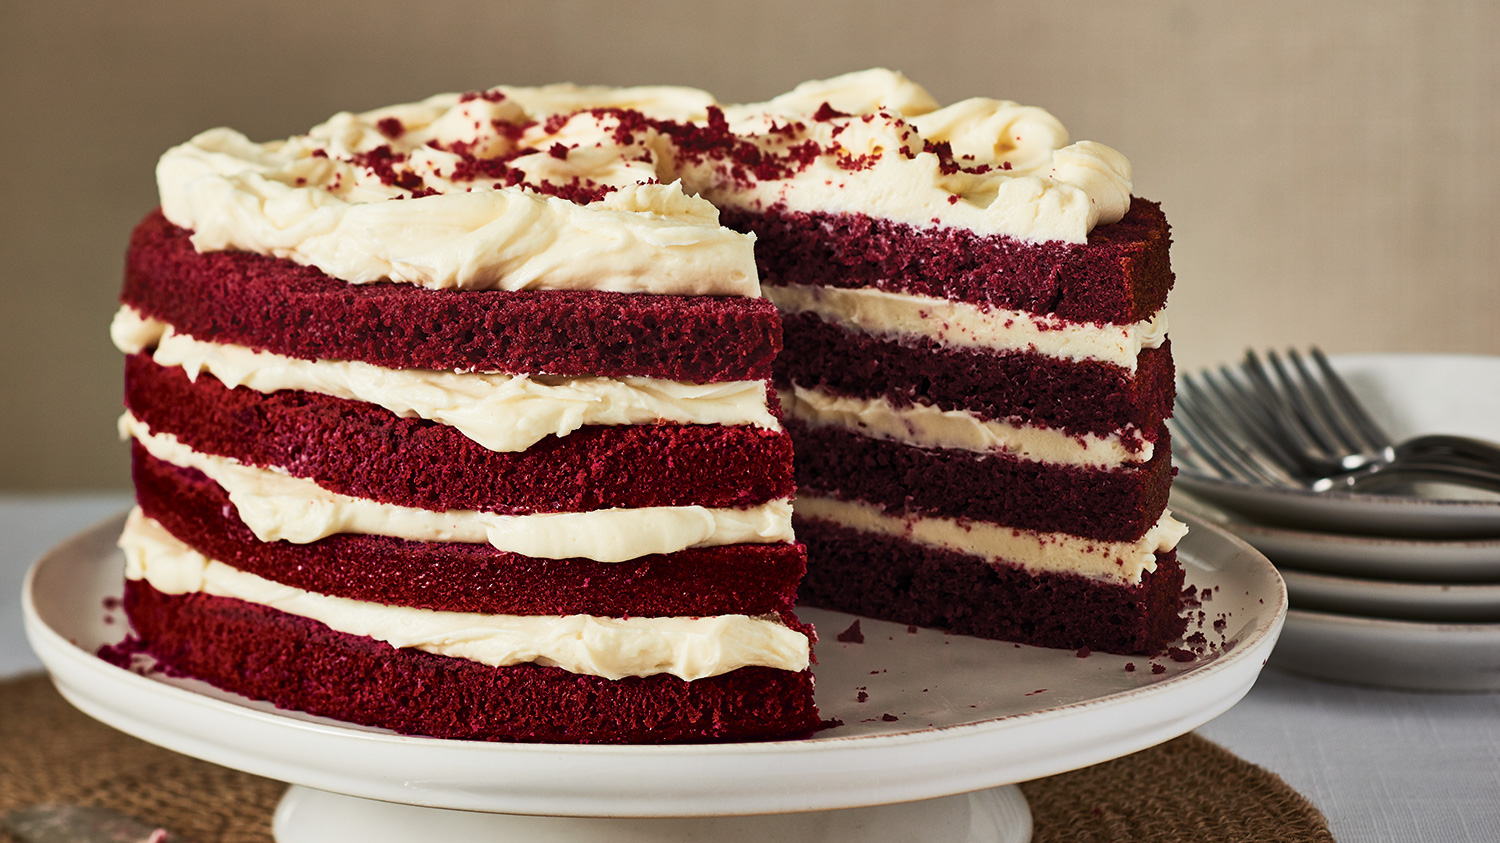
Classic Red Velvet Cake With Cream Cheese Frosting
Classic Red Velvet Cake with Cream Cheese Frosting is one of those timeless desserts that feels both elegant and comforting at the same time. The deep red crumb, subtle cocoa flavor, and slight tang from buttermilk create a balance that is unmistakable. Paired with smooth, tangy cream cheese frosting, this cake delivers richness without becoming overwhelming.
I bake this cake when I want something visually striking that still tastes familiar and nostalgic. The texture is soft and velvety, with a fine crumb that holds together beautifully when sliced. With the right technique and measured ingredients, you can recreate this bakery-style cake right in your own kitchen.
This is a complete, step-by-step recipe. If you follow along carefully, you will end up with three tender layers of red velvet cake stacked with luscious cream cheese frosting and finished with a smooth, classic look.
Ingredients For Classic Red Velvet Cake
Precision matters with red velvet cake because the balance of acidity, cocoa, and fat gives it its signature texture and flavor. I always measure carefully and make sure my refrigerated ingredients are at room temperature before starting.
For the cake layers, you will need:
- 2 1/2 cups (315 g) all-purpose flour
- 2 tablespoons unsweetened natural cocoa powder
- 1 teaspoon baking soda
- 1/2 teaspoon salt
- 1 cup (225 g) unsalted butter, softened
- 1 3/4 cups (350 g) granulated sugar
- 3 large eggs, room temperature
- 1 cup (240 ml) buttermilk, room temperature
- 2 tablespoons red food coloring
- 1 tablespoon white vinegar
- 2 teaspoons pure vanilla extract
For the cream cheese frosting:
- 16 ounces (450 g) full-fat cream cheese, softened
- 1 cup (225 g) unsalted butter, softened
- 4 cups (480 g) powdered sugar, sifted
- 2 teaspoons vanilla extract
- A small pinch of salt
Room temperature ingredients are essential for smooth blending and proper emulsification. Cold butter or cream cheese can lead to lumpy frosting or uneven batter.
Equipment Needed
I use three 8-inch round cake pans for tall, even layers. You will also need parchment paper, a stand mixer or hand mixer, mixing bowls, a whisk, a rubber spatula, and a cooling rack.
Before mixing anything, I preheat the oven to 350°F (175°C). I grease each pan lightly with butter, line the bottoms with parchment paper, and dust the sides with a thin layer of flour. Proper pan preparation prevents sticking and helps the cakes release cleanly.
Preparing The Dry Ingredients
I begin by sifting together the flour, cocoa powder, baking soda, and salt into a medium bowl. Sifting removes lumps and ensures even distribution of the cocoa and leavening agent. Since red velvet uses only a small amount of cocoa, even mixing is especially important.
After sifting, I whisk the dry ingredients briefly to combine them fully. I set the bowl aside while I move on to the butter and sugar.
Creaming Butter And Sugar
The structure of this cake depends on proper creaming. I place the softened butter in the mixing bowl and beat it on medium speed for about one minute until smooth and creamy. The butter should be soft but not greasy or melted.
I gradually add the sugar while continuing to beat. Over the next four to five minutes, the mixture becomes pale and fluffy. This stage incorporates air into the batter, which contributes to a soft crumb.
I scrape down the sides and bottom of the bowl halfway through. Even mixing at this stage ensures consistent texture in the finished cake.
Adding Eggs And Flavoring
I add the eggs one at a time, beating well after each addition. This gradual process keeps the batter smooth and prevents separation. Once all the eggs are incorporated, I mix in the vanilla extract.
In a separate small bowl, I combine the buttermilk and red food coloring, stirring until evenly blended. The liquid should turn a vibrant red color. I use gel or liquid food coloring depending on what I have, but I make sure it is evenly mixed before adding it to the batter.
Combining Wet And Dry Ingredients
With the mixer on low speed, I add the dry ingredients in three additions, alternating with the red buttermilk mixture in two additions. I begin and end with the dry ingredients. This alternating method keeps the batter smooth and prevents overmixing.
I mix only until the flour disappears into the batter. Overmixing can result in a tougher cake, so I stop as soon as everything is combined.
In a small bowl, I stir together the vinegar and baking soda. It will bubble briefly. I quickly fold this mixture into the batter with a spatula, ensuring it is evenly incorporated. This reaction enhances the cake’s light texture.
The finished batter should be smooth, vibrant red, and moderately thick.
Filling The Cake Pans
I divide the batter evenly among the three prepared pans. Using a kitchen scale ensures uniform layers, but careful eyeballing works as well. I gently tap each pan on the counter to release any large air bubbles.
I smooth the tops with a spatula to encourage even baking. Then I place the pans in the center of the oven with space between them for air circulation.
Baking The Red Velvet Layers
The cakes bake for about 22 to 28 minutes. I begin checking at 22 minutes by inserting a toothpick into the center of one layer. If it comes out clean or with a few moist crumbs, the cakes are done.
The tops should spring back lightly when touched. The edges will pull slightly away from the sides of the pans. I avoid opening the oven door too early to prevent the layers from collapsing.
Once baked, I remove the pans from the oven and let them cool for 10 to 15 minutes. Then I run a knife around the edges and turn the cakes out onto a cooling rack. I peel off the parchment paper and allow the layers to cool completely before frosting.
Making Cream Cheese Frosting
Cream cheese frosting defines this cake. I beat the softened cream cheese on medium speed until smooth and creamy. Then I add the softened butter and continue beating until fully combined and fluffy.
I gradually add the sifted powdered sugar, mixing on low speed at first to prevent it from flying everywhere. Once incorporated, I increase the speed and beat until light and smooth.
I mix in the vanilla extract and a small pinch of salt. The frosting should be thick, creamy, and spreadable. If it feels too soft, I chill it for 15 to 20 minutes before assembling the cake.
Assembling The Cake
I place one cooled cake layer on a serving plate or cake board. I spread an even layer of cream cheese frosting on top, smoothing it toward the edges. I repeat this process with the second layer.
After placing the third layer on top, I apply a thin crumb coat over the entire cake. This seals in loose crumbs and creates a clean base. I chill the cake for about 20 minutes to set the crumb coat.
Once chilled, I apply a thicker final layer of frosting, smoothing the sides and top with an offset spatula. For a classic look, I keep the finish simple and smooth. Sometimes I crumble a small piece of leftover cake and sprinkle it lightly on top for decoration.
Achieving The Perfect Texture
The hallmark of a well-made red velvet cake is its tender, velvety crumb. Proper creaming and alternating dry and wet ingredients help maintain softness. The buttermilk and vinegar contribute acidity, which reacts with baking soda to create lift.
I pay close attention to baking time because overbaking can dry out the layers. The cake continues to cook slightly from residual heat once removed from the oven.
Allowing the layers to cool completely before frosting prevents melting and sliding. Patience at this stage makes the final presentation much cleaner.
Storage And Make-Ahead Tips
I store the finished cake covered in the refrigerator because of the cream cheese frosting. It stays fresh for up to four days. Before serving, I let it sit at room temperature for about 30 minutes to soften slightly.
If I need to prepare in advance, I bake the layers a day ahead and wrap them tightly in plastic wrap once cooled. They can also be frozen for up to two months. I thaw them overnight in the refrigerator before frosting.
The frosting can be made one day ahead and stored in the refrigerator. I rewhip it briefly before using to restore its smooth texture.
Troubleshooting Common Problems
If the cake turns out dense, the butter and sugar may not have been creamed long enough. Proper aeration is essential for a light crumb. Expired baking soda can also affect rise.
If the color looks dull, increasing the amount of food coloring slightly can intensify the red tone. Using natural cocoa powder rather than Dutch-processed cocoa helps maintain the traditional hue.
If the frosting becomes runny, the cream cheese or butter may have been too warm. Chilling it briefly usually solves the problem.
Serving Suggestions
I slice this cake with a sharp knife wiped clean between cuts for neat presentation. The vibrant red layers contrast beautifully with the pale frosting. It pairs well with coffee, tea, or a cold glass of milk.
For special occasions, I decorate the top with piped swirls of frosting around the edge. Fresh berries can also add color and brightness without overpowering the classic flavor profile.
The balanced sweetness and slight tang make this cake suitable for birthdays, holidays, and celebrations of all kinds.
Final Thoughts
Classic Red Velvet Cake with Cream Cheese Frosting remains a favorite in my kitchen because it delivers both beauty and flavor. The tender crumb, subtle cocoa notes, and tangy frosting create a combination that feels timeless. With careful measuring, proper mixing, and attention to detail, you can bake a red velvet cake that rivals any bakery version.
Once you slice into the deep red layers and taste the smooth cream cheese frosting, you will understand why this cake has remained popular for generations. It is reliable, impressive, and deeply satisfying from the first bite to the last.