
Chocolate Orange Celebration Cake fills my kitchen with the deep aroma of cocoa and bright citrus long before it reaches the table. This cake is rich, moist, and layered with a smooth orange-infused chocolate frosting that makes it perfect for birthdays, holidays, and special gatherings. The balance between dark chocolate and fresh orange zest gives it a bold yet refreshing flavor that feels festive without being overly sweet.
I bake this cake when I want something elegant but still comforting. The chocolate layers are soft and tender, while the orange notes lift the entire dessert and prevent it from feeling heavy. The recipe is straightforward, and if you follow the steps carefully, you will end up with a bakery-style cake made entirely in your own kitchen.
This guide walks you through the full process, from preparing the pans to decorating the finished cake. By the time you place it on the table, you will have a stunning Chocolate Orange Celebration Cake that slices beautifully and tastes even better.
Ingredients For The Chocolate Cake Layers
For two 8-inch round cake layers, gather the following ingredients:
- 200 grams (1 cup) granulated sugar
- 180 grams (3/4 cup) light brown sugar
- 200 grams (1 2/3 cups) all-purpose flour
- 75 grams (3/4 cup) unsweetened cocoa powder
- 2 teaspoons baking powder
- 1 1/2 teaspoons baking soda
- 1/2 teaspoon salt
- 2 large eggs, room temperature
- 240 ml (1 cup) whole milk, room temperature
- 120 ml (1/2 cup) vegetable oil
- Zest of 2 medium oranges
- 2 tablespoons fresh orange juice
- 1 teaspoon pure vanilla extract
- 240 ml (1 cup) hot water or hot brewed coffee
I prefer using natural cocoa powder for this recipe because it pairs beautifully with the baking soda and enhances the chocolate flavor. The brown sugar adds moisture and a subtle caramel undertone that deepens the overall taste. Fresh orange zest is essential, as bottled flavorings cannot replicate the brightness of real citrus oils.
Room temperature ingredients blend more evenly and create a smoother batter. I always take the eggs and milk out of the refrigerator at least 30 minutes before baking. Small details like this help ensure a consistent texture.
Ingredients For The Orange Chocolate Frosting
For the frosting that will fill and coat the cake, you will need:
- 200 grams unsalted butter, softened
- 350 grams (about 3 cups) powdered sugar
- 150 grams dark chocolate, melted and cooled slightly
- Zest of 1 orange
- 2 tablespoons fresh orange juice
- 1 teaspoon vanilla extract
- 2 to 3 tablespoons heavy cream, as needed
- A small pinch of salt
The butter must be soft but not melted, as this ensures a fluffy frosting. Dark chocolate with around 60 percent cocoa provides richness without overwhelming sweetness. The orange zest ties the frosting directly to the cake layers and creates a unified flavor throughout the dessert.
Heavy cream helps adjust the consistency. Depending on the humidity in your kitchen, you may need slightly more or less to reach a smooth, spreadable texture.
Preparing The Cake Pans
I start by preheating the oven to 175°C (350°F). Consistent oven temperature is important for even baking, so I let the oven fully heat before placing the cakes inside.
Next, I grease two 8-inch round cake pans thoroughly with butter or oil. I line the bottoms with parchment paper circles and lightly dust the sides with cocoa powder instead of flour. Using cocoa keeps the cake edges dark and prevents white residue from appearing on the surface.
After preparing the pans, I set them aside and move directly to mixing the batter. Having everything ready before combining ingredients makes the process smooth and stress-free.
Mixing The Dry Ingredients
In a large mixing bowl, I sift together the flour, cocoa powder, baking powder, baking soda, and salt. Sifting removes lumps and ensures that the cocoa distributes evenly throughout the batter.
I add both the granulated sugar and brown sugar to the bowl and whisk everything together. Mixing the sugars with the dry ingredients helps break up any clumps and ensures even sweetness in every bite.
The dry mixture should look uniform in color, with no streaks of cocoa or flour visible. Once fully combined, I set the bowl aside and prepare the wet ingredients.
Combining The Wet Ingredients
In a separate bowl, I whisk the eggs until slightly frothy. Then I add the milk, vegetable oil, orange zest, orange juice, and vanilla extract. I whisk until the mixture looks smooth and evenly blended.
The aroma of fresh orange zest at this stage is vibrant and fragrant. Rubbing the zest lightly between my fingers before adding it releases even more citrus oils, intensifying the flavor.
Once the wet ingredients are combined, I slowly pour them into the bowl of dry ingredients. I stir gently with a spatula until just combined, being careful not to overmix.
Adding The Hot Liquid
The final step in the batter is adding hot water or hot coffee. I pour it in gradually while stirring slowly. The batter will become thinner than typical cake batters, but this is exactly what creates a moist, tender crumb.
Using hot coffee enhances the chocolate flavor without making the cake taste like coffee. If you prefer, hot water works perfectly well and still produces a rich result.
The finished batter should be smooth and glossy. I divide it evenly between the two prepared pans, making sure each contains roughly the same amount.
Baking The Cake Layers
I place the pans on the center rack of the preheated oven and bake for 30 to 35 minutes. Around the 30-minute mark, I begin checking for doneness by inserting a toothpick into the center.
If the toothpick comes out with a few moist crumbs but no wet batter, the cakes are ready. Overbaking can dry out the layers, so I watch carefully during the final minutes.
Once baked, I remove the pans from the oven and let them cool for about 10 minutes. Then I carefully turn the cakes out onto a wire rack, peel off the parchment paper, and allow them to cool completely before frosting.
Preparing The Orange Chocolate Frosting
While the cakes cool, I prepare the frosting. In a large bowl, I beat the softened butter with a hand mixer until light and creamy. This usually takes about three to four minutes.
I gradually add the powdered sugar, one cup at a time, mixing on low speed to prevent clouds of sugar from filling the air. Once incorporated, I increase the speed slightly and beat until smooth.
Next, I pour in the melted and slightly cooled dark chocolate. I add the orange zest, orange juice, vanilla extract, and a pinch of salt. I beat everything together until the frosting becomes silky and uniform.
If the frosting seems too thick, I add heavy cream one tablespoon at a time until it reaches a spreadable consistency. The final texture should be soft enough to glide across the cake but firm enough to hold its shape.
Assembling The Cake
Once the cake layers are completely cool, I place one layer on a serving plate or cake stand. I spread a generous layer of frosting over the top, reaching all the way to the edges.
I carefully place the second cake layer on top, aligning it evenly. Then I apply a thin layer of frosting around the entire cake to create a crumb coat. This thin layer traps loose crumbs and creates a smooth base.
I refrigerate the cake for about 20 to 30 minutes to set the crumb coat. After chilling, I apply the final layer of frosting, smoothing the sides and top with an offset spatula.
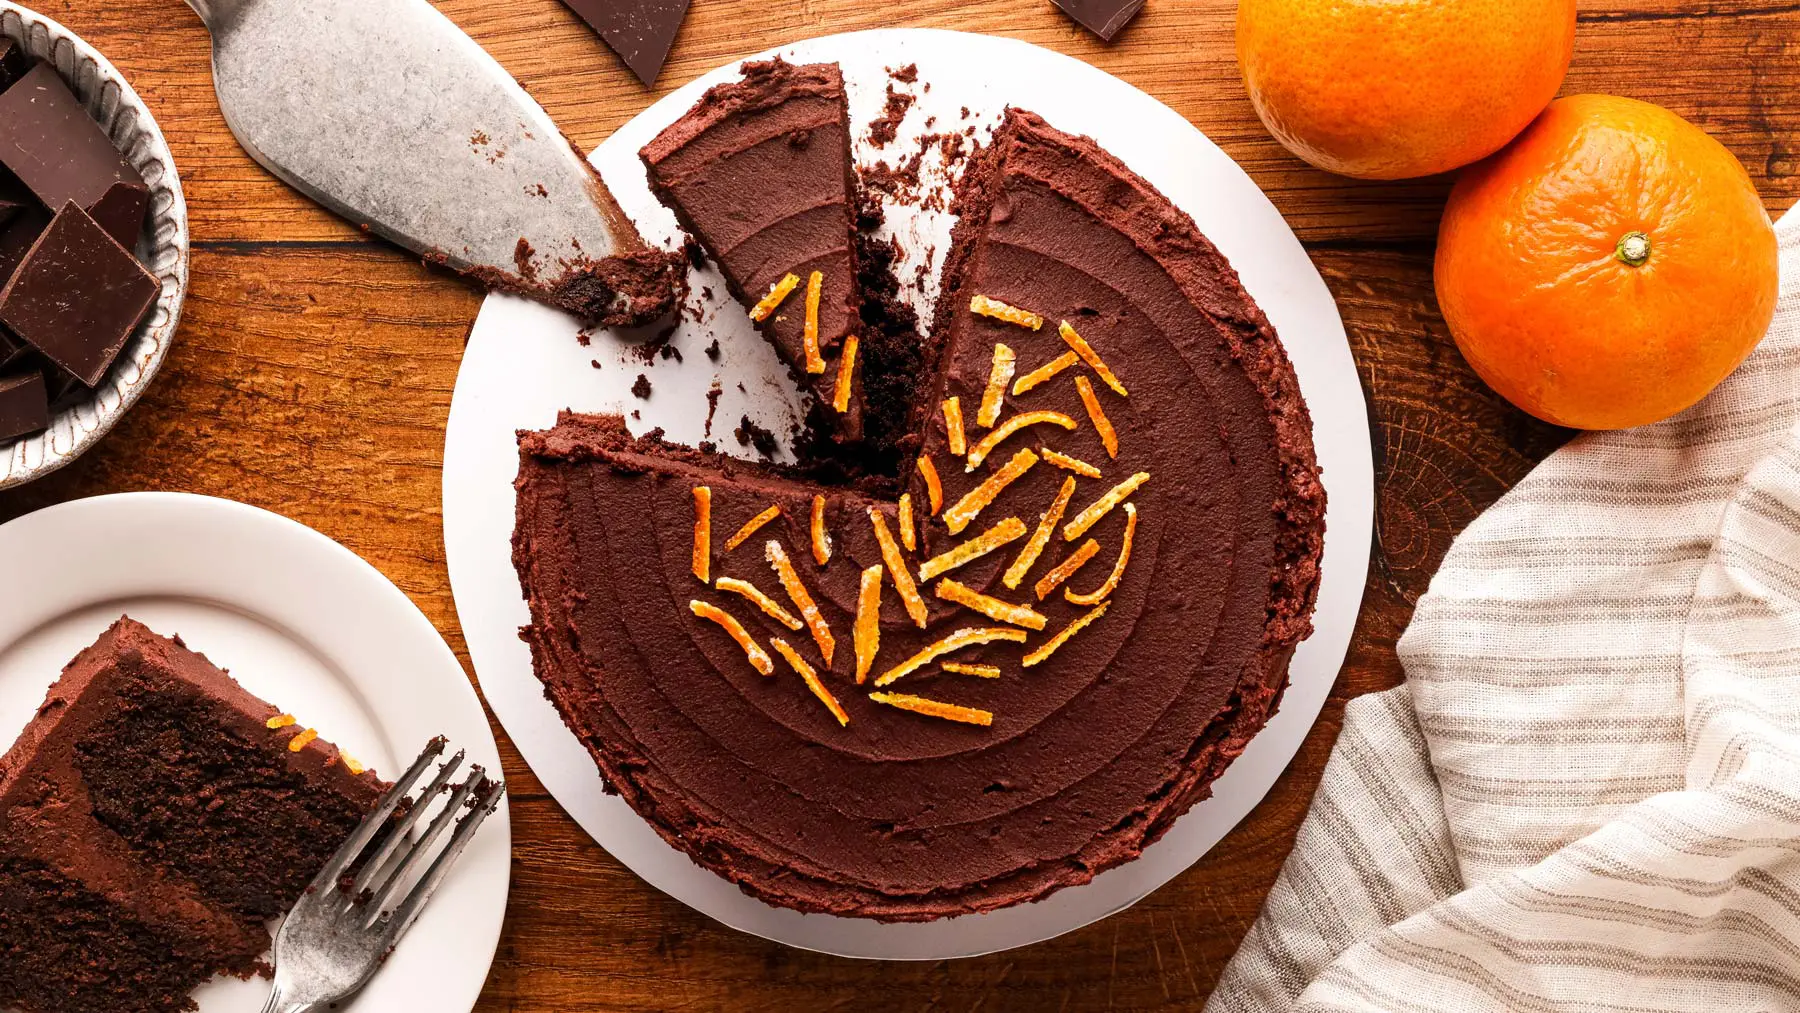
Decorating The Chocolate Orange Celebration Cake
For a simple yet elegant decoration, I like to add fresh orange zest over the top of the cake. The bright orange flecks contrast beautifully against the dark chocolate frosting.
Chocolate curls or shaved chocolate also make a stunning garnish. I sometimes melt a small amount of chocolate, spread it thinly on parchment paper, let it set slightly, and then scrape it into curls with a knife.
Candied orange slices arranged around the top edge create a festive appearance perfect for celebrations. The combination of textures and colors makes the Chocolate Orange Celebration Cake look as impressive as it tastes.
Flavor Tips And Variations
If you want a stronger orange flavor, you can brush each cake layer lightly with a mixture of orange juice and a tablespoon of sugar before frosting. This adds moisture and intensifies the citrus notes.
For a slightly different texture, you can add a thin layer of orange marmalade between the cake layers before spreading the frosting. The marmalade introduces a subtle bitterness that balances the sweetness beautifully.
A small splash of orange liqueur in the frosting can deepen the flavor for adult gatherings. The alcohol cooks off minimally in frosting, so use it thoughtfully if serving to children.
Storing And Serving
This cake can be stored at room temperature for up to two days in an airtight container. If your kitchen is warm, refrigeration is a safer option, though I recommend letting the cake sit at room temperature for about 30 minutes before serving so the frosting softens.
The texture remains moist for several days thanks to the oil in the batter. Each slice reveals tender chocolate crumb with hints of citrus woven throughout.
For clean slices, I use a sharp knife dipped in hot water and wiped dry between cuts. This keeps the layers neat and the frosting smooth.
Final Thoughts
Chocolate Orange Celebration Cake delivers bold chocolate flavor balanced by fresh citrus brightness in every bite. The layers are moist and tender, the frosting is smooth and rich, and the overall presentation feels worthy of any special occasion. From mixing the batter to decorating the final cake, each step builds anticipation for that first slice.
This recipe relies on simple techniques and accessible ingredients, yet the result feels elegant and festive. With careful attention to detail and proper timing, you can confidently bake this cake and serve it proudly at your next gathering.
Once you taste the harmony of chocolate and orange together in this cake, it may become your signature celebration dessert. Follow the steps, trust the process, and enjoy the experience of baking and sharing a homemade Chocolate Orange Celebration Cake that truly lives up to its name.