Stevia Sweetened Vanilla Cake
Stevia Sweetened Vanilla Cake delivers classic vanilla flavor with a soft, tender crumb while significantly reducing added sugar. I bake this cake when I want something light, fragrant, and suitable for those cutting back on sugar without sacrificing taste. The key is balancing stevia correctly with other ingredients so the cake tastes natural rather than overly sweet or artificial.
This recipe is straightforward and practical. If you follow the measurements closely and mix carefully, you will end up with a moist vanilla cake that works beautifully for birthdays, simple desserts, or even afternoon tea. The structure is stable enough for layering, yet soft enough to enjoy on its own.
Ingredients For Stevia Sweetened Vanilla Cake
Baking with stevia requires precision because it is much sweeter than regular sugar. I use a granulated baking blend designed to measure cup-for-cup like sugar, which simplifies the process and ensures proper structure.
For the cake:
2 cups all-purpose flour
3/4 cup granulated stevia baking blend (cup-for-cup sugar replacement)
1 teaspoon baking powder
1/2 teaspoon baking soda
1/2 teaspoon salt
2 large eggs, room temperature
1/2 cup plain Greek yogurt or sour cream
1/3 cup neutral oil such as sunflower or avocado oil
1/2 cup milk, dairy or unsweetened almond milk
1 tablespoon pure vanilla extract
1 teaspoon apple cider vinegar
Optional light vanilla glaze:
3/4 cup powdered sugar substitute
1 to 2 tablespoons milk
1/2 teaspoon vanilla extract
This recipe fits one 8-inch or 9-inch round cake pan, or a standard loaf pan.
Preparing The Oven And Pan
Preheat your oven to 350°F (175°C). Allow the oven to reach full temperature before placing the cake inside.
Lightly grease your cake pan with oil. Line the bottom with parchment paper and grease the parchment lightly for easy release.
Keep the prepared pan within reach so the batter can be transferred immediately after mixing.
Mixing The Dry Ingredients
In a medium bowl, whisk together the flour, stevia baking blend, baking powder, baking soda, and salt. Whisking thoroughly ensures even distribution of the leavening agents.
Stevia blends can sometimes clump, so breaking up lumps at this stage helps achieve a smooth batter. Uniform mixing also prevents uneven sweetness.
Set this bowl aside while you prepare the wet ingredients.
Combining The Wet Ingredients
In a large mixing bowl, whisk the eggs until lightly frothy. Add the yogurt and whisk until smooth and creamy.
Stir in the oil, milk, vanilla extract, and apple cider vinegar. Whisk until everything is fully combined.
The yogurt adds moisture and tenderness, while the vinegar reacts with baking soda to help the cake rise properly.
Bringing The Batter Together
Gradually add the dry ingredients into the wet mixture. Fold gently with a spatula until just combined.
Avoid overmixing, as this can develop gluten and make the cake dense. The batter should look smooth and slightly thick but pourable.
Scrape down the sides of the bowl to ensure even incorporation.
Baking The Cake
Pour the batter into the prepared pan and smooth the top with a spatula. Tap the pan lightly on the counter to remove air bubbles.
Place the pan on the middle rack of the oven. Bake for 25 to 35 minutes, checking at the 25-minute mark.
Insert a toothpick into the center of the cake. If it comes out clean or with a few moist crumbs, the cake is ready.
Allow the cake to cool in the pan for 10 to 15 minutes before transferring it to a wire rack to cool completely.
Preparing The Optional Glaze
In a small bowl, whisk together the powdered sugar substitute, milk, and vanilla extract. Mix until smooth and slightly thick.
Drizzle the glaze over the cooled cake. Let it set before slicing.
This glaze adds a touch of sweetness and enhances the vanilla flavor without significantly increasing sugar content.
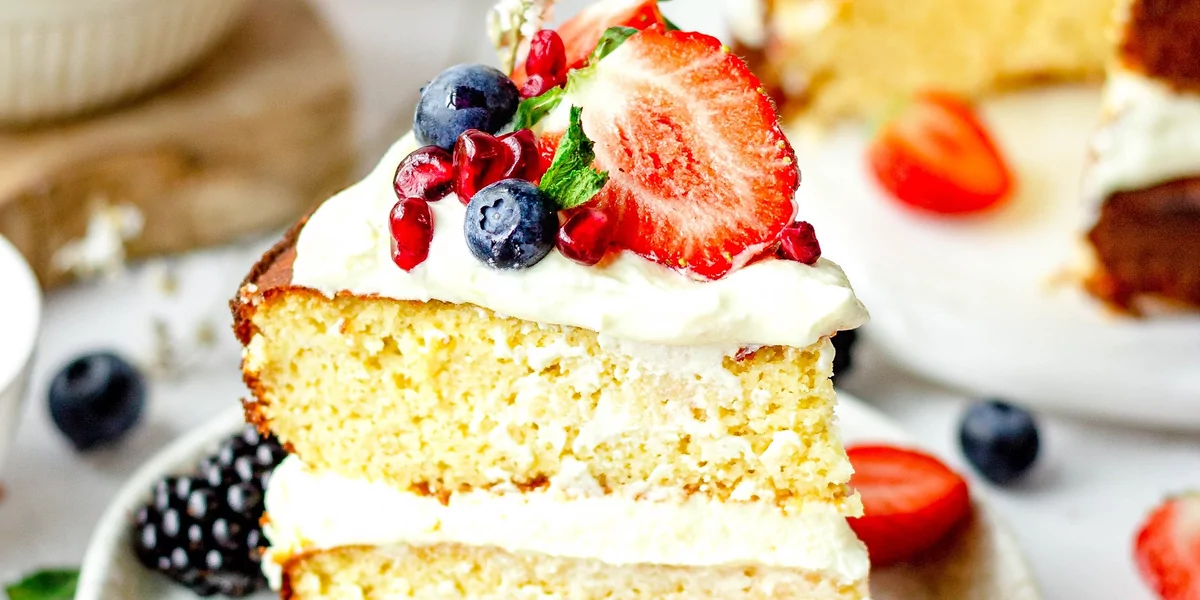
Texture And Flavor Profile
Stevia Sweetened Vanilla Cake has a soft, tender crumb with a clean vanilla aroma. The sweetness is mild and balanced rather than overpowering.
The yogurt keeps the interior moist, while the oil prevents dryness. Proper measurement of stevia ensures there is no bitter aftertaste.
The cake feels light yet satisfying.
Storage And Shelf Life
Store the cake in an airtight container at room temperature for up to two days. If your kitchen is warm, refrigerate it for better freshness.
In the refrigerator, it remains moist for up to five days. Allow slices to come to room temperature before serving for best texture.
You can freeze individual slices wrapped tightly for up to two months.
Helpful Tips For Best Results
Use a stevia blend specifically designed for baking. Pure stevia extract alone does not provide enough bulk for proper cake structure.
Measure flour accurately by spooning and leveling. Too much flour can make the cake dense.
Avoid overbaking, as sugar-reduced cakes can dry out more quickly than traditional cakes.
Ensure all ingredients are at room temperature for smooth mixing.
Flavor Variations
Add lemon zest for a bright citrus twist. A teaspoon of zest pairs beautifully with vanilla.
Fold in fresh berries for a fruity version. Lightly coat berries in flour before adding to prevent sinking.
For a layered cake, double the recipe and use two 8-inch pans. Fill with sugar-free jam or whipped cream between layers.
You can also add a teaspoon of almond extract for subtle depth.
Serving Suggestions
Serve slices plain with coffee or tea for a simple dessert. The gentle sweetness makes it suitable for breakfast as well.
Top with fresh strawberries and a spoonful of Greek yogurt for a lighter option. A dusting of powdered sugar substitute enhances presentation.
Warming a slice slightly intensifies the vanilla aroma.
Why This Recipe Works
The stevia baking blend replaces sugar while maintaining volume and sweetness. Yogurt provides moisture and tenderness that sugar normally contributes.
The combination of baking powder, baking soda, and vinegar ensures proper rise. Oil keeps the crumb soft even without traditional sugar levels.
Careful mixing preserves texture and prevents density.
Final Thoughts
Stevia Sweetened Vanilla Cake proves that reducing sugar does not mean sacrificing flavor or texture. The soft crumb, fragrant vanilla, and balanced sweetness create a cake that feels classic yet mindful.
By following the step-by-step instructions and measuring carefully, you can bake this cake confidently in your own kitchen. It offers a practical and delicious option for those seeking a lower-sugar dessert while still enjoying a homemade vanilla cake.