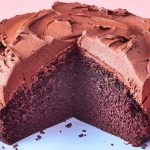
Retro Yellow Cake With Chocolate Frosting
Retro Yellow Cake with Chocolate Frosting brings back the kind of simple joy that never goes out of style. The golden layers are soft, buttery, and tender, while the chocolate frosting is rich, creamy, and deeply satisfying. I bake this cake when I want something classic that feels like it belongs at a birthday party, a family gathering, or right in the center of a weekend kitchen table.
This is a true from-scratch recipe, built on basic ingredients and solid technique. The yellow cake gets its color and richness from egg yolks and butter, while the frosting relies on real cocoa and good butter for depth of flavor. If you follow the steps carefully and give attention to mixing times and temperatures, you will end up with a cake that slices beautifully and tastes even better the next day.
Everything is explained clearly so you can move from measuring ingredients to frosting the final layer without hesitation.
Ingredients For The Yellow Cake Layers
I always gather and measure my ingredients before I begin. Room temperature butter, eggs, and milk make a noticeable difference in texture and consistency.
For the cake:
- 3 cups (375 g) all-purpose flour
- 2 1/2 teaspoons baking powder
- 1/2 teaspoon baking soda
- 1/2 teaspoon salt
- 1 cup (225 g) unsalted butter, softened
- 1 3/4 cups (350 g) granulated sugar
- 4 large eggs, room temperature
- 2 large egg yolks, room temperature
- 2 teaspoons pure vanilla extract
- 1 1/4 cups (300 ml) whole milk, room temperature
- 1/4 cup (60 ml) sour cream, room temperature
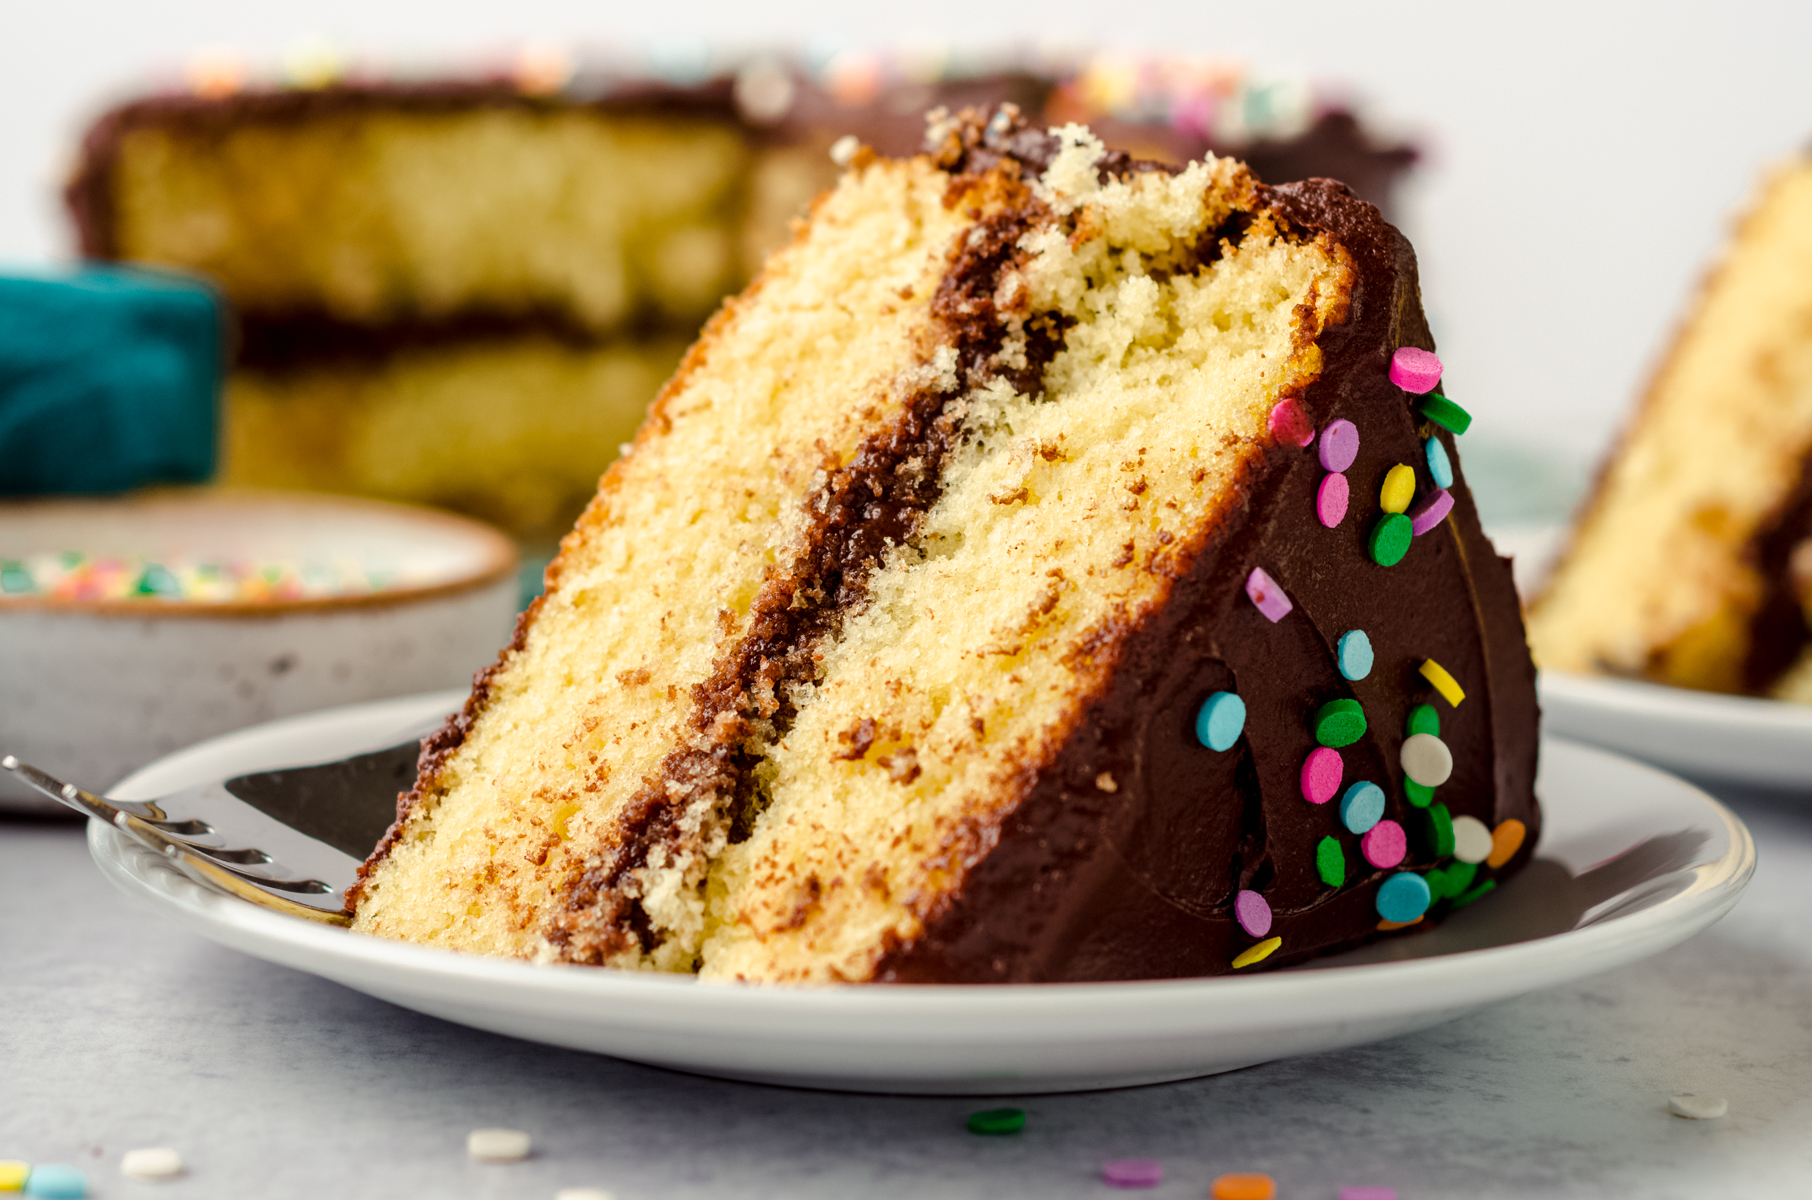
The combination of whole eggs and extra yolks gives this cake its signature golden color and rich crumb. Sour cream adds moisture and a slight tang that balances the sweetness.
Ingredients For The Chocolate Frosting
This frosting is smooth, fluffy, and packed with chocolate flavor. It spreads easily and holds its shape once set.
For the frosting:
- 1 cup (225 g) unsalted butter, softened
- 3/4 cup (65 g) unsweetened cocoa powder
- 3 1/2 cups (420 g) powdered sugar
- 1/3 cup (80 ml) whole milk or heavy cream
- 2 teaspoons vanilla extract
- 1/4 teaspoon salt
Using good quality cocoa powder enhances the overall flavor. I sift the powdered sugar before adding it to prevent lumps.
Preparing The Pans And Oven
I preheat the oven to 350°F (175°C). For a traditional layer cake, I use two 9-inch round cake pans. I grease them thoroughly with butter, line the bottoms with parchment paper, and lightly flour the sides.
This preparation prevents sticking and ensures that the layers release cleanly. A clean release makes assembly easier and keeps the layers intact.
Mixing The Dry Ingredients
In a medium bowl, I whisk together the flour, baking powder, baking soda, and salt. Even distribution of the leavening agents helps the cake rise evenly. Whisking also breaks up any clumps in the flour.
I set the bowl aside and move on to the butter and sugar mixture.
Creaming Butter And Sugar
In the bowl of my stand mixer, I beat the softened butter on medium speed until smooth. I gradually add the granulated sugar and continue beating for four to five minutes. The mixture becomes pale, fluffy, and noticeably lighter in texture.
This step is essential for a tender cake. Proper creaming incorporates air into the batter, giving the finished cake a soft crumb.
Adding Eggs And Flavoring
I add the eggs one at a time, beating well after each addition. Then I incorporate the two extra egg yolks, which deepen the color and enrich the flavor. After the eggs are fully blended, I mix in the vanilla extract.
The batter should look smooth and slightly glossy at this stage. If it appears curdled, I scrape down the bowl and continue mixing gently until it comes together.
Incorporating Sour Cream And Milk
In a small bowl, I stir together the milk and sour cream until smooth. With the mixer on low speed, I add the dry ingredients in three additions, alternating with the milk mixture in two additions. I begin and end with the dry ingredients.
I mix only until the flour disappears into the batter. Overmixing can develop gluten, which leads to a denser texture rather than a soft one.
Dividing And Baking The Cake
I divide the batter evenly between the prepared pans. To ensure equal layers, I sometimes use a kitchen scale. Even layers bake more consistently and stack neatly.
The cakes bake for 28 to 32 minutes. I test for doneness by inserting a toothpick into the center. If it comes out clean or with a few moist crumbs, the cakes are ready.
After removing them from the oven, I let the layers cool in their pans for about 10 minutes. Then I turn them out onto wire racks to cool completely.
Preparing The Chocolate Frosting
While the cakes cool, I begin making the frosting. In a large bowl, I beat the softened butter until creamy and smooth. I add the cocoa powder and mix until fully incorporated, scraping down the sides of the bowl as needed.
Gradually, I add the powdered sugar one cup at a time, alternating with milk or cream. This prevents the frosting from becoming too thick too quickly. I mix in the vanilla extract and salt, then beat on medium speed for two to three minutes until the frosting becomes light and fluffy.
If the frosting feels too thick, I add a small splash of milk. If it feels too soft, I add a bit more powdered sugar.
Leveling The Cake Layers
Once the cakes are completely cool, I check the tops for doming. If necessary, I trim them gently with a serrated knife to create flat surfaces. Flat layers stack more evenly and give the finished cake a clean appearance.
I brush away any loose crumbs before beginning the assembly process.
Assembling The Cake
I place one cake layer on a serving plate or cake stand. I spread a generous amount of chocolate frosting evenly over the top, reaching close to the edges. The frosting layer should be thick enough to provide flavor but not so thick that it spills over excessively.
I place the second cake layer on top, pressing gently to secure it. Then I apply a thin crumb coat of frosting around the entire cake. This initial layer seals in crumbs and provides a smooth base.
I refrigerate the cake for about 20 minutes to set the crumb coat. Once chilled, I apply the final layer of frosting, smoothing the sides and top with an offset spatula.
Texture And Flavor Profile
This retro yellow cake has a tender, moist crumb with a buttery richness that feels nostalgic. The egg yolks contribute both flavor and color, giving the cake its warm golden hue. The sour cream adds subtle tang and moisture without making the cake heavy.
The chocolate frosting is smooth, creamy, and full of cocoa flavor. The slight salt enhances the chocolate and balances the sweetness. Together, the cake and frosting create a combination that feels classic and deeply satisfying.
Storage And Make-Ahead Tips
I store the finished cake covered at room temperature for up to two days. If the kitchen is warm, I refrigerate it and allow it to come to room temperature before serving. The flavor and texture are best when the cake is not cold.
The cake layers can be baked a day in advance and wrapped tightly in plastic wrap once cooled. The frosting can also be prepared ahead and stored in the refrigerator, then rewhipped before use.
Troubleshooting Common Problems
If the cake layers turn out dense, the butter and sugar may not have been creamed long enough. Proper aeration at the beginning is crucial. Overmixing after adding flour can also lead to a firmer texture.
If the frosting appears grainy, the powdered sugar may need additional mixing. Sifting the sugar beforehand helps prevent this issue.
If the layers slide while frosting, chilling the cake briefly stabilizes everything.
Serving Suggestions
I slice this cake with a long, sharp knife, wiping the blade clean between cuts. Clean slices highlight the golden crumb and smooth frosting layers. A glass of cold milk or a cup of coffee pairs beautifully with a slice.
This cake works well for birthdays, casual celebrations, or simply as a comforting dessert at the end of a meal. Its familiar flavor makes it appealing to both children and adults.
Final Thoughts
Retro Yellow Cake with Chocolate Frosting remains popular for good reason. It relies on straightforward ingredients and careful technique to produce a dessert that feels both simple and special. The buttery cake and rich chocolate frosting complement each other perfectly without overwhelming the palate.
Baking this cake from scratch brings a sense of satisfaction that boxed mixes cannot replicate. With patience and attention to detail, you can create a timeless cake that tastes as good as it looks. Once you serve it and see the clean golden layers beneath that smooth chocolate finish, you will appreciate how enduring this classic truly is.