
Rich chocolate lava cake without special molds is one of those desserts that looks dramatic on the plate yet comes together with simple tools and pantry staples. I make this recipe when I want something deeply chocolatey, warm, and slightly indulgent without pulling out fancy ramekins or specialty baking equipment. All you need are a standard muffin tin or even small oven-safe cups, and you are well on your way to a molten-centered masterpiece.
The magic of lava cake lies in timing and balance. The edges bake just enough to set into a soft cake, while the center stays fluid and silky. I have tested this method repeatedly in a regular muffin pan, and it delivers that flowing chocolate center every single time. If you follow the steps carefully and pay attention to baking time, you will cut into the cake and watch the chocolate spill out just like it does in restaurants.
This recipe is designed so you can read through it once and confidently head into the kitchen. I explain the ingredients, the mixing process, baking tips, and even how to unmold the cakes without breaking them. By the end, you will have a rich chocolate lava cake without special molds that looks impressive and tastes even better.
Ingredients You Will Need
For four generous lava cakes, gather the following ingredients:
- 115 grams (1/2 cup) unsalted butter
- 170 grams (about 1 cup) good-quality dark chocolate, chopped
- 2 large eggs
- 2 large egg yolks
- 100 grams (1/2 cup) granulated sugar
- 1 teaspoon pure vanilla extract
- 30 grams (1/4 cup) all-purpose flour
- 1/4 teaspoon salt
- Unsweetened cocoa powder or flour for dusting the pan
- Butter for greasing the pan
I always recommend using chocolate that you enjoy eating on its own. Since chocolate is the main flavor here, its quality directly affects the final result. A dark chocolate with around 60 to 70 percent cocoa gives the best balance between sweetness and depth.
The eggs and extra yolks are essential because they create structure while still allowing that molten center to form. The small amount of flour helps the edges set without turning the entire cake into a fully baked sponge. Each ingredient has a purpose, and together they create that signature contrast between firm exterior and flowing interior.
Equipment From A Standard Kitchen
You do not need ramekins or special molds for this recipe. I regularly use a standard 12-cup muffin tin and fill only four wells. You can also use small oven-safe coffee cups if you do not own a muffin pan.
Aside from the baking pan, you will need a heatproof bowl, a saucepan for melting chocolate over simmering water or a microwave-safe bowl, a whisk, a spatula, and a mixing bowl. A kitchen scale helps with accuracy, but measuring cups work fine if that is what you have.
A timer is your most important tool. The difference between a molten center and a fully baked cake can be as little as one or two minutes. Set your timer and stay close to the oven near the end of baking.
Preparing The Pan Properly
Greasing the pan correctly makes all the difference when it comes to unmolding the cakes. I start by generously buttering the inside of each muffin well. I make sure to coat the bottom and sides thoroughly, reaching into the corners so nothing sticks.
After buttering, I add a small spoonful of cocoa powder into each well and rotate the pan to coat the surface. I tap out any excess. Using cocoa powder instead of flour keeps the exterior dark and avoids white patches on the finished cake.
Once the pan is prepared, I place it in the refrigerator for about 10 minutes while I prepare the batter. This helps the butter firm up, creating a barrier that releases more easily after baking.
Melting The Chocolate And Butter
I start by placing the chopped dark chocolate and butter into a heatproof bowl. Then I set the bowl over a saucepan with gently simmering water, making sure the bottom of the bowl does not touch the water. The steam slowly melts the chocolate and butter together.
While it melts, I stir occasionally with a spatula until the mixture becomes smooth and glossy. This usually takes a few minutes. If you prefer using a microwave, heat in short 20-second bursts, stirring between each interval to prevent scorching.
Once fully melted, I remove the bowl from the heat and let it cool slightly. The mixture should still be fluid but not piping hot, as extremely high heat can scramble the eggs in the next step.
Mixing The Eggs And Sugar
In a separate mixing bowl, I whisk together the eggs, egg yolks, and granulated sugar. I whisk for about two to three minutes until the mixture becomes slightly pale and a bit thicker. This step incorporates air, which helps create a tender texture around the edges.
I add the vanilla extract and whisk again briefly. The aroma of vanilla blends beautifully with dark chocolate and enhances its richness.
At this point, the egg mixture should look smooth and slightly frothy on top. Proper whisking ensures the sugar dissolves and the final cakes are not grainy.
Combining Wet And Dry Ingredients
I slowly pour the slightly cooled chocolate and butter mixture into the egg mixture while whisking gently. Pouring gradually prevents the eggs from cooking and helps everything blend evenly.
Once combined, I sift in the flour and salt directly over the bowl. I fold them in using a spatula rather than a whisk. Folding gently avoids deflating the air incorporated earlier.
The final batter should be smooth, glossy, and thick but pourable. It will have a deep chocolate color and a luxurious sheen that hints at the richness to come.
Filling The Muffin Tin
I remove the prepared muffin tin from the refrigerator and divide the batter evenly among four wells. Each one should be about three-quarters full. Avoid overfilling, as the cakes will rise slightly during baking.
To ensure even baking, I gently tap the pan on the counter once or twice. This releases any large air bubbles trapped in the batter.
At this stage, you can refrigerate the filled pan for up to 24 hours if you want to prepare ahead. If baking straight away, move directly to the oven.
Baking For The Perfect Molten Center
I preheat the oven to 220°C (425°F). A hot oven is crucial because it sets the exterior quickly while leaving the center soft.
I place the muffin tin on the middle rack and bake for 10 to 12 minutes. At the 10-minute mark, I begin watching closely. The edges should look firm and slightly puffed, while the center will still look a bit soft and slightly jiggly.
In my oven, 11 minutes usually produces the ideal lava flow. If baked for 12 to 13 minutes, the center becomes more pudding-like rather than fully liquid. You can adjust by a minute depending on your preference.
Resting And Unmolding The Cakes
Once out of the oven, I let the cakes rest in the pan for exactly one minute. This brief rest helps them firm up just enough to handle without losing the molten center.
I run a thin knife carefully around the edges to loosen them. Then I place a small plate upside down over each muffin well and invert the pan. With a gentle shake, the cake releases onto the plate.
If you greased and dusted the pan well, the cakes should slide out smoothly. Seeing the perfectly shaped cake sitting on the plate is always satisfying.
Serving Suggestions
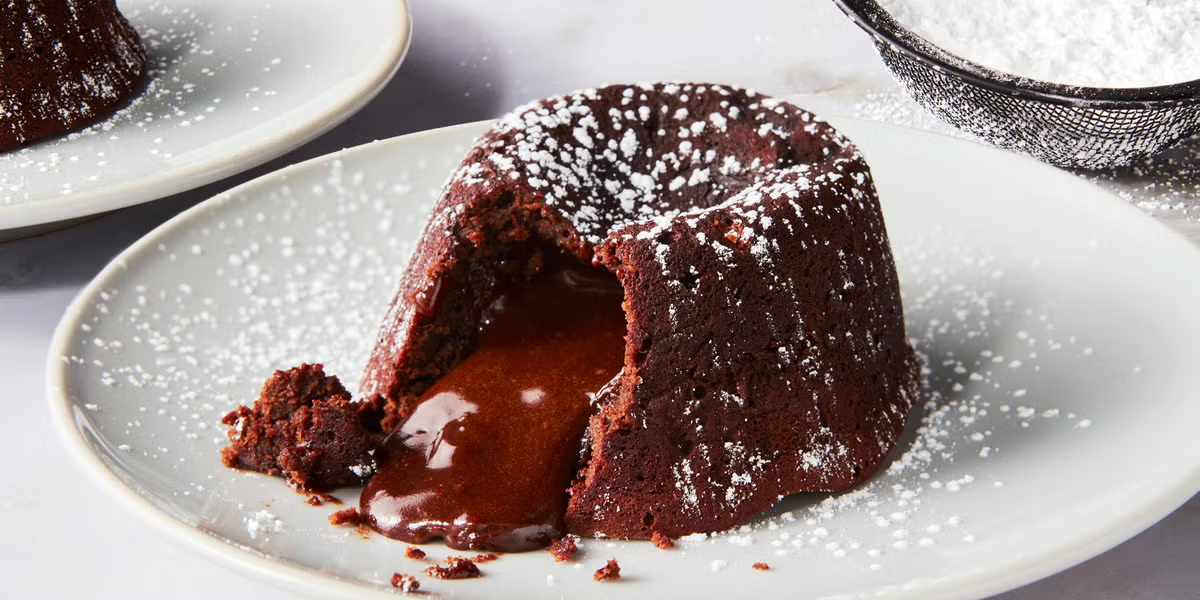
I like to serve the cakes immediately while they are still warm. A light dusting of powdered sugar adds a simple decorative touch without overpowering the chocolate flavor.
A scoop of vanilla ice cream on the side creates a beautiful contrast between hot and cold. The melting ice cream blends with the flowing chocolate center, forming a rich sauce on the plate.
Fresh berries such as raspberries or strawberries cut through the richness with their natural acidity. Even a dollop of lightly whipped cream works wonderfully if you prefer something less sweet than ice cream.
Troubleshooting Common Issues
If your cakes do not have a molten center, they were likely baked a minute or two too long. Next time, reduce the baking time slightly and test again. Oven temperatures can vary, so it helps to know how your own oven behaves.
If the cakes collapse completely when unmolded, they may have been underbaked. The edges need enough structure to hold the shape. Try adding one more minute in the oven.
Sticking usually results from insufficient greasing. Be generous with butter and cocoa powder, and do not skip chilling the pan briefly before filling it.
Flavor Variations To Try
Once you master the base recipe for rich chocolate lava cake without special molds, you can experiment with flavors. Adding a pinch of espresso powder to the batter intensifies the chocolate without making it taste like coffee.
A teaspoon of orange zest folded into the batter creates a subtle citrus note that pairs beautifully with dark chocolate. For a hint of warmth, a small pinch of cinnamon or chili powder adds depth without overpowering the dessert.
You can even place a small square of chocolate or a spoonful of chocolate hazelnut spread in the center of each filled well before baking. This guarantees an extra gooey interior and adds a pleasant surprise when cut open.
Making It Ahead Of Time
This dessert is perfect for entertaining because the batter can be prepared in advance. I often fill the muffin wells, cover the pan tightly with plastic wrap, and refrigerate it for several hours.
When ready to bake, I let the pan sit at room temperature for about 15 minutes while the oven preheats. The baking time may need an extra minute if the batter is still slightly chilled.
Serving warm lava cakes to guests feels impressive, yet most of the work is done beforehand. It reduces stress and allows you to focus on presentation.
Storage And Reheating
Lava cakes are best enjoyed fresh, but leftovers can be stored in an airtight container in the refrigerator for up to two days. The center will firm up as it cools, turning into a fudgy texture rather than flowing lava.
To reheat, I place a cake in the microwave for about 20 to 30 seconds. The center softens again, though it may not be as fluid as when freshly baked.
Even when fully set, the flavor remains intensely chocolatey and satisfying. It becomes more like a rich chocolate fondant cake rather than a molten dessert.
Why This Method Works Without Special Molds
Using a muffin tin instead of ramekins works because the depth and diameter are similar. The key is controlling baking time and properly preparing the surface.
The high oven temperature quickly cooks the outer layer while leaving the interior underbaked by design. The ratio of eggs, yolks, chocolate, and flour ensures enough structure around the edges.
Rich chocolate lava cake without special molds proves that technique matters more than equipment. With attention to detail, you can achieve restaurant-quality results in an ordinary home kitchen.
Final Thoughts
Rich chocolate lava cake without special molds has become one of my favorite desserts to make when I want maximum impact with minimal fuss. It relies on simple ingredients, basic equipment, and precise timing rather than complicated techniques. Each time I slice into the cake and watch the chocolate center flow onto the plate, it feels just as satisfying as the first successful attempt.
This recipe invites you to slow down and enjoy the process. From melting the chocolate to carefully unmolding the warm cakes, every step builds anticipation. Once you master the timing in your own oven, you will have a reliable go-to dessert that never fails to impress.
With this detailed guide, you can confidently head into your kitchen and create a rich chocolate lava cake without special molds that looks elegant and tastes deeply indulgent. Follow the steps closely, trust your timer, and enjoy every warm, molten bite.